You can import new registration requests into the Registration module by using a file saved in comma separated value (CSV) format. You must adhere to the guidelines for importing company and contact information described in “Importing Companies and Contacts Using CSV Files” .
General Import Requirements Summary
Here is a high-level summary of .csv file requirements:

Registration Import Requirements
These fields are required in the .csv file:
|
|
To specify which legal profile to assign to a trading partner in a .csv file, use the identifier for the legal profile found in the first column of the Provisioning Configuration list page (Admin > Legal Profile tab). Map the identifier to the Legal Profile Form field during the import process.
|
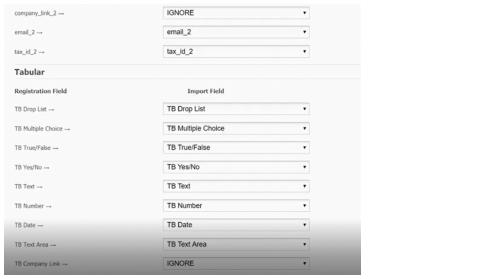
Registration Import Requirements for Tabular Data
In addition to following the “General Import Requirements Summary” and the “Registration Import Requirements” , you must adhere to these requirements:
Importing Registration Requests in a .csv File
Security roles: Community Administrator
When importing a .csv file, you are prompted to map or link each column header in your .csv file to a field that exists in the registration request. The column heading might be the name of a core field, such as Last Name, or it might be a custom field specific to your community, such as Hire Date. If a non-required field is not included in the .csv file, you select IGNORE for that field when mapping the fields in the request to the fields in the .csv file.
Use this procedure to import registration requests using a .csv file.
To import registration requests using a .csv file
|
1
|
The Registration Requests tab opens.
|
2
|
Click Import.
|
The Upload the File page opens.
|
3
|
|
6
|
Click Next.
|
The Map the Fields page opens.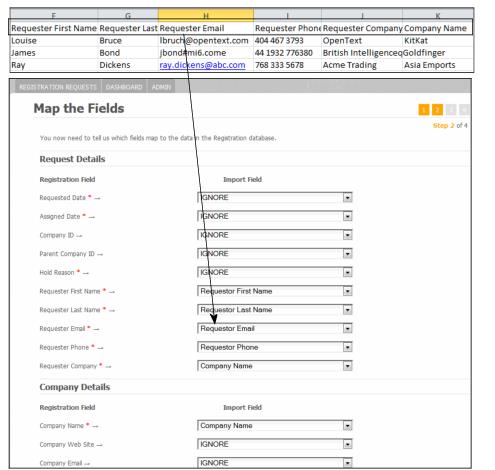
|
8
|
Click Next.
|
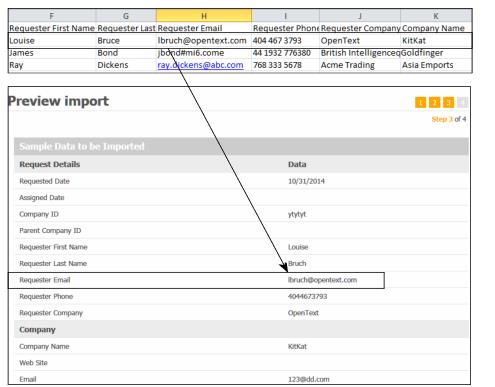
The Preview Import for tabular data displays.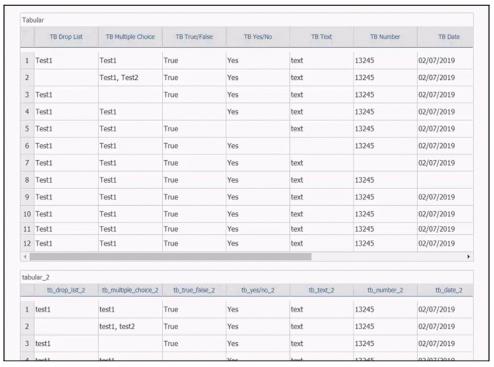
|
9
|
Click Next.
|

|
10
|
(Optional) In the email, click Download Reject CSV File, and review the Error Messages column for hints about how to fix the invalid data.
|